-
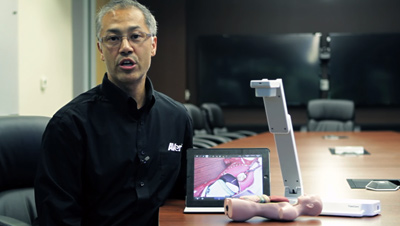
AVer TabCam Guided Tour
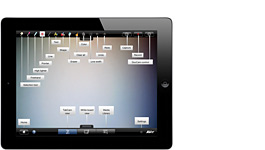
TabCam App Downloads
TabCam App FAQ
 |
 |
| The Camera | The App |
|
|
| Apple iOS | |||
| Brand | Model | Size | TabCam compatibility |
| Apple | iPad2 | 9.7” | Yes |
| iPad (3rd gen) | 9.7” | Yes | |
| iPad Mini | 7.9” | Yes | |
| iPad (4th gen) | 9.7” | Yes | |
| Android | |||
| Brand | Model | Size | TabCam compatibility |
| SAMSUNG | Galaxy Tab2 10.1 | 10.1”(1280*800) | Yes |
| Galaxy Tab3 10.1 | 10.1”(1280*800) | Yes | |
| Galaxy Note 10.1 | 10.1”(1280*800) | Yes | |
| Sony | Xperia Tablet Z | 10.1”(1920*1200) | Yes |
| Acer | ICONIA B | 7”(1024*600) | No |
| ASUS | TF300T | 10.1”(1280*800) | Yes |
| Nexus 7 | 7”(1280*800) | Yes | |
| Windows Tablet |
Minimum requirements for Windows 8 tablet:
|
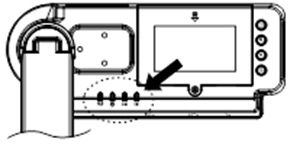
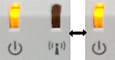
| Battery LED | Battery Capacity |
| Green | Between 30% - 100% |
| Orange | Between 10% - 30% |
| Red | Between 3% - 10% |
| Flashing Red | Less than 3% |
TabCam App Troubleshooting

Solution: It means the QR Code scanning has failed. Please check the following steps:
- Make sure when you scan the QR Code that you minimize the glare on the tablet by placing a piece of paper over the camera head.
- Adjust focus: Press auto-focus button.
- Avoid being out-of-range: Make sure your computer/tablet screen is about 13 inches (330 mm) away from camera head.
- Reset: If repeating this sequence still does not work, press zoom-in or zoom-out to cancel the scanning process and restart the application and TabCam. Go through the setup instructions again to connect your TabCam to the Wi-Fi network.
and does not turn solid green
Solution: After scanning the QR Code successfully, activation should take about 30 seconds. If it takes longer than 30 seconds, this could mean your Wi-Fi network password was incorrect, or that your network may not be fully compatible with TabCam. Please check the following steps:
- If you have multiple Wi-Fi networks, choose the one with the strongest signal.
- Make sure the Wi-Fi router is still up and the security key is correctly entered.
- Check Wi-Fi Network Names and Passwords. TabCam can only join Wi-Fi neworks with names and passwords containing only letters and numbers. If the Wi-Fi router is WPA/WPA2 Enterprise, it is very possible the wrong password may cause the user's login to be locked. Please check MIS to unlock it.
- Make sure your TabCam's firmware version is the latest one.
- Make sure your computer/tablet is connected to the same Wi-Fi networks (same SSID) as the TabCam.
- Security software (firewall, anti-virus) installed on your computer may be blocking communication between TabCam and computer/tablet. Your Wi-Fi router also may be blocking some TCP/UDP ports. When these ports are blocked, TabCam cannot access the Wi-Fi. Please check MIS to unblock. Below is a list of ports we used.
TCP/UDP Port UDP 1900 TCP 9527 TCP 9528 TCP 8557
- Connect two wireless devices (PC, iPad, or Android) to the same Wi-Fi network.
- Install WiFi Test Tool by AVer Information Inc. on both devices:
a.For PC: Download the WiFi Test Tool here
b.For iPad: Download the WiFi Test Tool by AVer Information Inc. in the App Store (search AVer)
c.For Android: Download the WiFi Test Tool by AVer Information Inc. in the Google Play Store (search AVer)
- Run the WiFi Test Tool on both devices and enter the Remote Device IP of the other device (this is the devices IPv4 address)
- Press Start on both devices to begin the test
- If the test passes, your Wi-Fi is compatible with the TabCam and should have no problems connecting. If the test fails, you may have to change some settings in your router for the TabCam to connect.
- Please call our tech support and let us know the error log that is generated from the WiFi Test Tool in order for us to help you troubleshoot the problem.
Please refer to this demonstration of the WiFi Test Tool if you need help running the test. http://youtu.be/v7WjHAFgWFc
- TabCam and your computer/tablet must be within 45 feet (13m) of your Wi-Fi router.
- There may be other devices using your Wi-Fi network at the same time. Bandwidth usage, packet loss and other connection elements may cause the poor video quality.
- Make sure your Internet connection has a minimum upload speed of 2.8 Mbps.
- Your Wi-Fi router must be 802.11 g/n compatible.
- If the above steps don't work, please restart your TabCam and try the QR Code scanning again.
- Check Wi-Fi Network Names and Passwords. If Wi-Fi Network Names and Passwords are changed, please following the Wi-Fi setup page to reset the Wi-Fi information to TabCam.
- If Wi-Fi Network Names and Passwords have not changed, please restart Wi-Fi router and your TabCam.
- TabCam is not compatible with 802.11a/b and 5GHz networks; use a 2.4GHz 802.11g/n network.
- Set the 2.4GHz Radio Mode on 802.11n routers to 802.11g/n (802.11g for 802.11g routers).
- AES, TKIP and AES+TKIP are supported wireless encryption methods.
- For WPA/WPA2 enterprise, TabCam only support PEAP and not EAP-TLS, EAP-TTLS.
- Minimum required bandwidth is 2.8 Mbit/s for optimal TabCam performance.
- Set your router's Wi-Fi channel selection to "Auto".
- Don't use a "Hidden" Wi-Fi network name.
- Update your Wi-Fi router to the latest firmware.
- Check for sources of potential interference (Microwave ovens, Bluetooth devices, faulty satellite television cables, power lines, cordless telephones, wireless speakers, flat-panel televisions, etc).
The TCP/UDP ports in use are. Please check with your System or Network Administrator to make sure that these ports are not blocked in the WIFI router.
| Port | TCP/UDP | Usage | Descriptions |
| 1900 | UDP | uPnP SSDP Package | For detecting and removing TabCams |
| 9527 | TCP | Command | To send/receive commands between the iPad and TabCam |
| 9528* | TCP | Command | To register connections for occupied TabCam |
| 8557 | TCP | RTSP | To connect to the RTSP Stream |
| Random | UDP | RTP | For RTP connection |
| Random | UDP | RTCP | For RTCP connection |
- Microwave ovens often radiate at 2.4 GHz, especially if they are in bad repair;
- Bluetooth devices use the 2.4 GHz spectrum, shared with Wi-Fi;
- Fusion lighting, sometimes used in high-ceilinged areas, can affect Wi-Fi; and
- Some cordless phones using DECT technology operate at 2.4 GHz.
Try to position the TabCam away from this interference and also away from the floor and any metal devices.
There are 2 ways to configure the TabCam to connect wirelessly to the network. You can do it via the TabCam App (available from the Apple AppStore) or the A+ Suite Software (PC/MAC) downloadable here.
To configure the TabCam via iPad, follow the on screen instructions available on the TabCam app.
To configure the TabCam via a personal computer, download either the PC or MAC version from http://www.averusa.com/education/support/aplus-suite
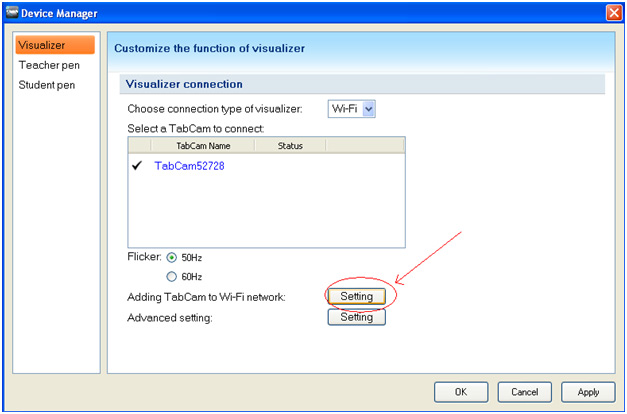
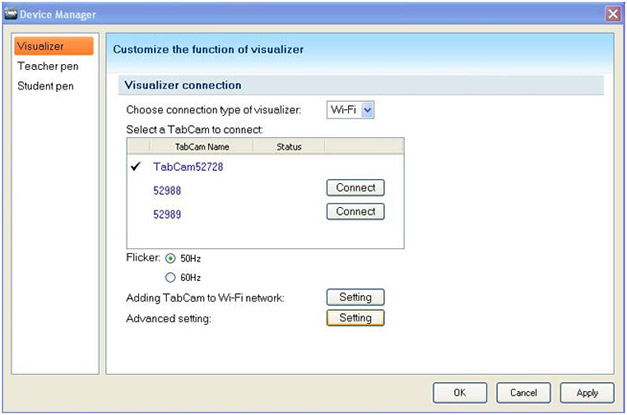
- Launch the "Device Manager" application found under the "AVer Information, Inc" -> A+ Suite folder.
- Make sure your computer is connected to the same WIFI network the intended TabCam is supposed to be connected to.
- Select "Setting" under Adding TabCam to WI-Fi network and follow the on-screen instructions.
Functional
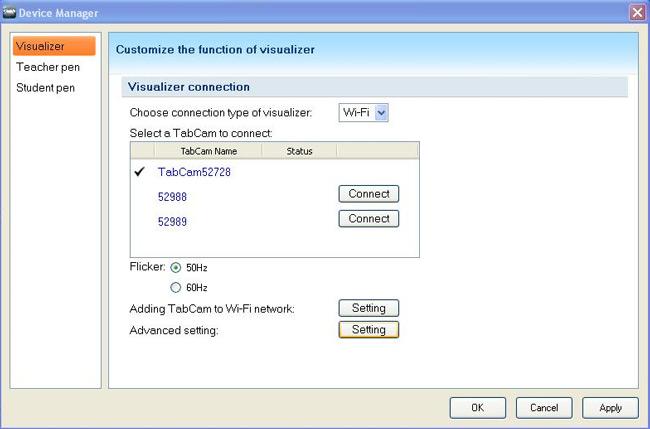
- Launch the "Device Manager" application found under the "AVer Information, Inc" -> A+ Suite folder.
- Make sure your computer is connected to the same Wi-Fi network the intended TabCam(s) is connected to.
- Select "Advanced Setting".
- Make sure the TabCam(s) which is already connected to the Wi-Fi network is turned on. Also, it is recommended that these TabCam(s) have the power plugged in.
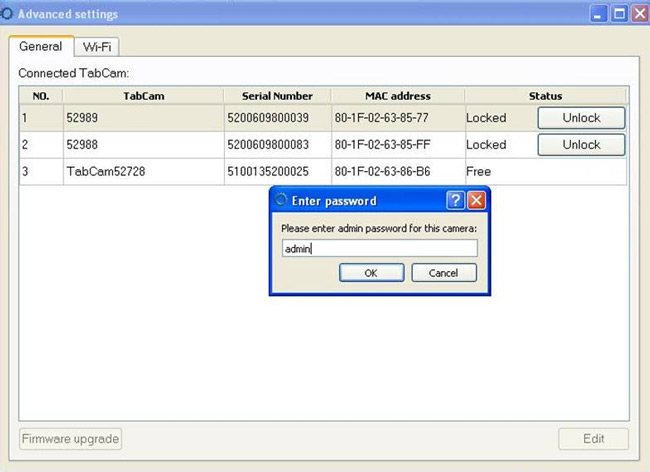
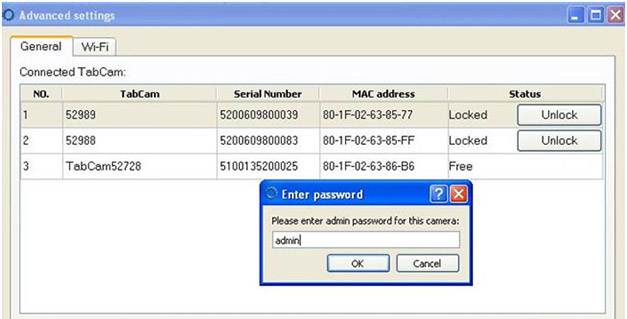
- All TabCams located in the same network will be listed as shown in the figure above.
- Those TabCams that are upgradable will show up as "Locked". Click on "Unlock" for each TabCam you would like to upgrade.
- The default password for TabCam is "admin". Once you have entered the password, the status changes to "Free".

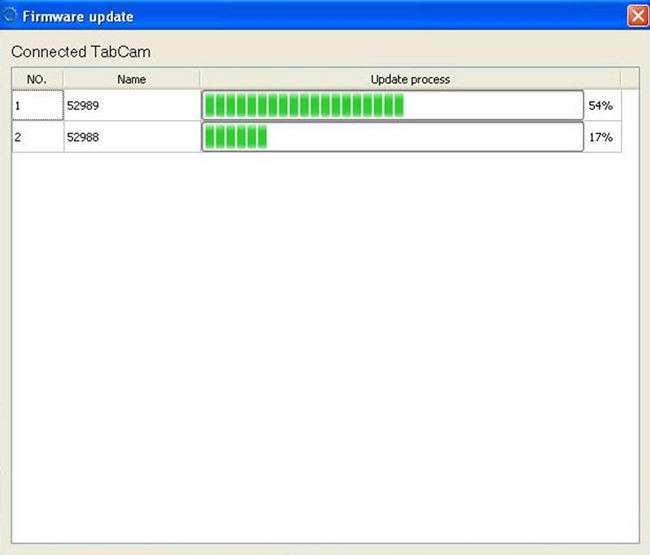
- Now you can click on the "Firmware upgrade" button and proceed to download the most recent firmware from the AVer server.
- The upgrade would proceed once the latest firmware has been downloaded onto your computer. Once every single TabCam(s) reaches 100%, you can close the "Firmware Update" window.
You would need to download the A+ Suite software and use the PC or MAC to secure access to your TabCam.
- Launch the "Device Manager" application found under the "AVer Information Inc" -> A+ Suite folder.
- Make sure your computer is connected to the same Wi-Fi network the intended TabCam(s) is connected to.
- Select "Advanced Setting".
- Make sure the TabCam(s) which is already connected to the Wi-Fi network is turned on. Also, it is recommended that these TabCam(s) have the power plugged in.
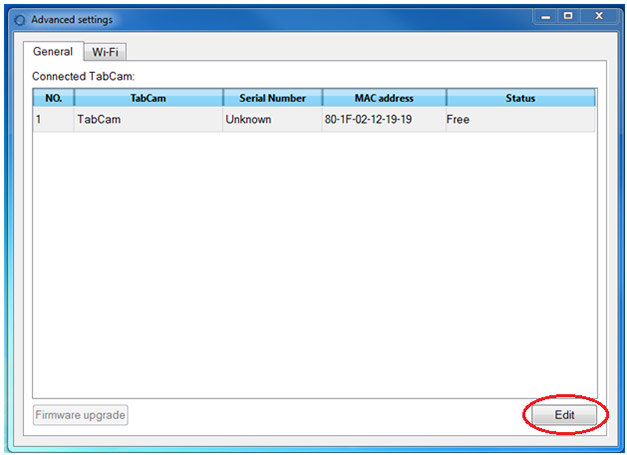
- All TabCams located in the same network will be listed as shown in the figure above.
- The TabCams will show up as "Locked". Click on "Unlock" to change the settings of each TabCam.
- The default password for TabCam is "admin". Once you have entered the password, the status changes to "Free".
- Once the TabCam status is free, highlight the desired TabCam and select "Edit".
- Check the "Use Passcode" box and enter the password you wish to use. When you are finished, press "OK" to confirm the changes. You will now be prompt to enter this password whenever you initially wish to connect to this TabCam.
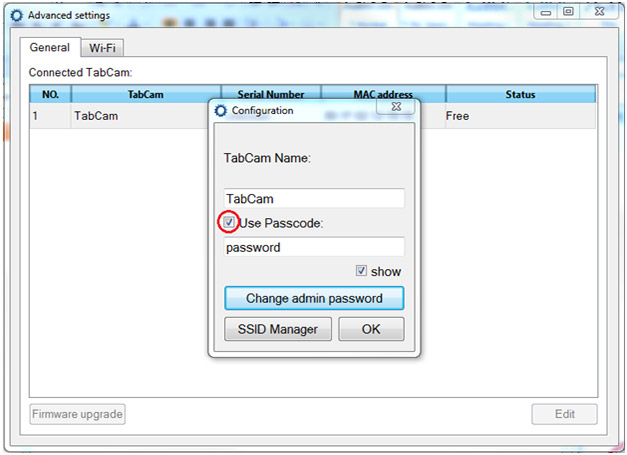
- For additional security, you may also protect the unlock feature once you connect to the TabCam. The password is "admin" by default but you may change this by selecting "Change admin password" and entering in a new password in the Configuration window.

- Password needs to be in ASCII code
a). WEP mode: lengths from 5 to 13 characters
b). WPA/WPA2 mode: from 8 to 63 characters
c). WPA Enterprise mode: at most 64 characters - SSID name are not restricted to ASCII code.
For ASCII: at most 32 characters.
For mixed character(eg. Japanese+English): 8 to 16 character.(depend on the size) - TabCam Name
For ASCII: at most 42 characters.
For mixed character(eg. Japanese+English): 10 to 21 character.(depend on the size)