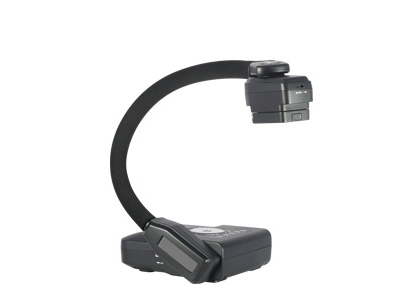
AVerVision CP130 Downloads
- AVerVision CP130 User Manual (Updated: 10/11/2010)
A+ Interactive Software (Old version)
- A+ Interactive Software 1.7 Software (v.1.7.1.6) - Mac
- A+ Interactive Software Quick Reference Guide - Mac
- A+ Interactive Software Uninstaller - Mac (Download and run this software to uninstall older A+ software before installing a new version)
AVerVision Software
- AVerVision 3 Software Quick Reference Guide - Windows
- AVerVision Software (Version 3.5.1.0002) - Win2K sp4, WinXP, Vista 32
- Software Installation Guide - Windows
- AVerVision 3 Software Quick Reference Guide - Mac
- AVerVision Software (Version 2.5.1.0004) - MacOS 10.3 (Panther), MacOS 10.4 (Tiger), MacOS 10.5 (Leopard, not compatible with Leopard 10.5.6)
- AVerVision Software (Version 2.8.2.0001) - MacOS X 10.5.6 (Download and run this software to uninstall older A+ software before installing a new version)
AVerVision CP130 FAQ
There is no picture on the presentation screen.
- Check all connections again as shown in the user manual.
- Verify the setting of the display output device; make sure it is set to the correct input channel.
- If you have a laptop connected to the document camera and cannot see your desktop on the presentation screen, please make sure to set your laptop to dual screen display mode.
- Check the TV/RGB switch on the left side of the camera and set it accordingly to the type of display device you have.
I have set up the Document Camera and checked all the connections as specified in the user manual but I cannot get a picture on the preferred presentation screen.
- The unit's power button turns orange in standby mode. Press the POWER button again to turn ON and the LED light will turn blue.
- The default camera display resolution setting is on 1024X768. If your output device does not support this resolution; no image can be projected. Simply press hold the MENU and < > button to increase or decrease the resolution setting.
- If your output device is a TV or any analog device, please switch the TV/RGB dip switch to TV.
The picture on the presentation screen is blurry.
- Reset your document camera to default by pressing Menu > Default > Yes > Enter. Finally power-cycle your camera.
- Check your output device's focus adjustment.
- If your Camera has Auto Focus, press the Auto focus button on your unit's control panel.
- If your Camera has Manual Focus, Adjust the focus ring located under the document camera's lens.
There is no computer signal on the presentation screen.
- Check all cable connections among the display device, Document Camera and your PC, replace cable(s) if necessary.
- Connect your PC to the Document Camera's RGB input first before you power on your computer.
- Make sure to switch your Laptop dual screen display mode.
There are distorted lines running across the presentation screen.
Reset your camera's display mode, press Menu > Settings > Mode > High Frame > Enter. Then return to Menu, select Default > Yes. Finally power-cycle your camera.
The brightness on the presentation screen is dark and unreadable.
- Toggle the Auto image button on your unit's control panel
- Reset your units display by pressing Menu, select Mode > Text. Return to Menu and select Default > Yes. Finally power-cycle your camera.
- Make sure there are sufficient lighting in the room or Turn on the LED lamp on your document camera head
- If you are in a dark environment, turn on "Night View" in your document camera's menu.
- Manually adjusts the Brightness and Contrast levels in the Camera's Menu.
- Check your projector's bulb, it may need to be changed.
The AVerVision Software cannot detect the document camera.
- Make sure your USB cable is connected
- Make sure the USB cable or computer USB port is not defective
- Check your Device Manager, If Digital presenter driver shows damaged, right click and select “Update Driver”.
- Make sure you have the most currently updated software, download list is found under Download tab.
For more AVerVision CP130 Q&A please visit this page


